
Lawn
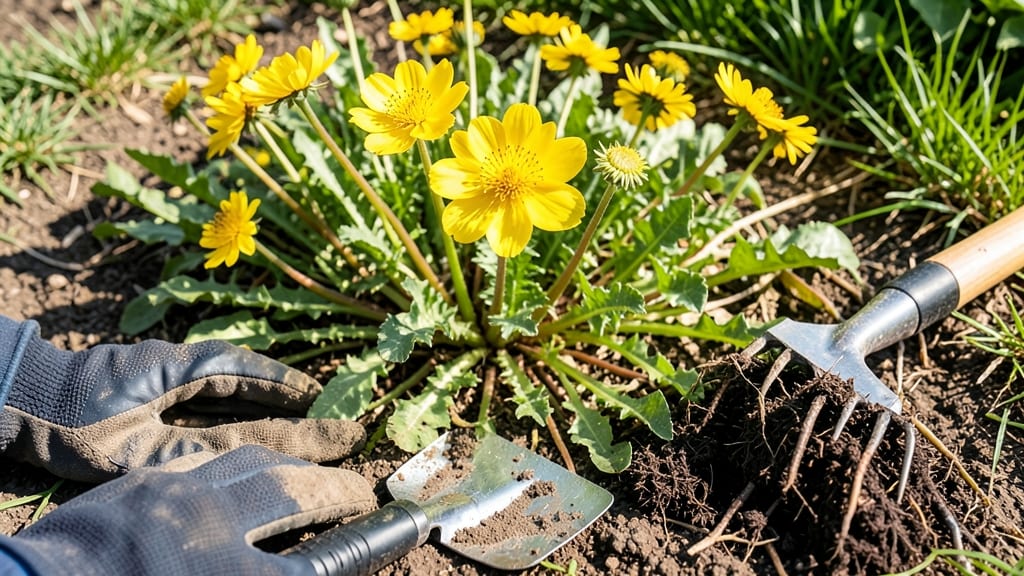
Buttercups turn your lawn into a bright yellow eyesore—unless you act now. ✨ These stubborn weeds spread fast, but I’ve perfected a two-step method that removes them completely, including those sneaky roots. The key? Timing and technique matter more than brute force.
Start when the soil is moist (after rain or watering) to loosen roots. Grab a weed puller or garden fork—never your hands, or you’ll curse later. For deep-rooted clumps, dig down 3-4 inches to break the taproot.
Discard the entire plant (roots and all) in the trash—never compost, or they’ll regrow. You’ll see results in one weekend if you tackle them early. The lawn fills in with grass within 2-3 weeks of consistent care.
Just don’t let them go to seed—one missed flower means dozens of new weeds next spring. For stubborn patches, repeat the process every 2 weeks until the area stays clear. Prevent regrowth by overseeding bare spots and keeping your lawn thick. Here’s how to do it right!
📚 In This Guide
- What you need
- Instructions
- Tips and common mistakes
- Wrapping up and next steps
What you need
- ● Garden gloves (1 pair) – Waterproof and durable to protect your hands from prickly stems and sap.
- ● Hand weeder or dandelion digger (1) – Look for a sturdy, claw-like tool for deep extraction.
- ● Garden trowel (1) – For stubborn roots that need extra leverage.
- ● Pruning shears or scissors (1 pair) – To trim thick stems or cut buttercups at ground level.
- ● Bucket or trash bag (1) – For collecting pulled weeds and debris.
- ○ Knee pads or cushion (optional) – For comfort during long sessions on hard ground.
- ● Vinegar solution (5% acetic acid) – Mix 1 gallon of vinegar + 1 oz. dish soap for a natural herbicide (use sparingly to avoid damaging grass).
- ● Corn gluten meal (organic pre-emergent) – Apply in early spring to prevent buttercup seeds from sprouting.
- ● Lawn fertilizer (high-nitrogen) – To promote thick, healthy grass that crowds out weeds.
- ● String trimmer or edger – For clearing buttercups along driveways or edges.
Step-by-step instructions for removing buttercups from your lawn
Here's how I tackle buttercups—without leaving roots behind or damaging your grass.
🌱 Step 1: Identify and Time Your Removal
Buttercups thrive in early spring, so I target them before they flower—usually between late February and April in most climates. Look for their bright yellow blooms or deep green, lobed leaves growing in clumps. The key is to pull them before they seed, or you'll have a new crop next year. I like to work on a dry, sunny day when the soil is slightly damp but not muddy—this makes the roots easier to extract.
If you spot buttercups in summer, they’ve likely already spread seeds, so focus on removing the plants while keeping your lawn healthy for next season. I always wear gloves (trust me, the sap stains) and a pair of old shoes—these weeds stick to fabric like glue.
✂️ Step 2: Pull by Hand for Small Patches
For isolated buttercups, I grab the plant just above the soil line and pull upward with a firm, steady motion. The goal is to remove the entire root system—buttercups regrow from even tiny root fragments. If the root breaks, dig around with a trowel to extract the remaining piece. I find it easiest to work in small sections, about 2 feet by 2 feet, so I don’t miss any hidden roots.
Don’t yank too hard—this can rip grass roots and leave bare spots. Instead, wiggle the plant gently while pulling. You’ll know you’ve got the whole root when the soil comes up clean and no green stems remain. I drop the pulled weeds into a heavy-duty trash bag immediately to prevent re-seeding.
💧 Step 3: Smother or Solarize Larger Infestations
For bigger patches, I cover the area with black plastic sheeting or thick cardboard for 4-6 weeks during hot weather. The heat kills the buttercups while protecting your grass. Secure the edges tightly so no light sneaks in—you’ll see the weeds die back within 2-3 weeks. After removing the cover, rake the area and reseed with grass if needed.
If smothering isn’t an option, I spot-treat with a vinegar-based herbicide (like a 20% acetic acid solution) on sunny days. Avoid this method near sidewalks or driveways—vinegar can damage other plants. Always water the lawn afterward to dilute any residual spray and protect your grass.
☀️ Step 4: Prevent Regrowth with Lawn Care
Buttercups love thin, weak grass, so I overseed bare spots with a high-quality turf mix and fertilize lightly. A sharp mower blade keeps grass healthy and competitive—never let it grow taller than 3-4 inches, or buttercups will take over. I also water deeply but infrequently to encourage deep grass roots that outcompete weeds.
In fall, I apply a pre-emergent herbicide (like corn gluten meal) to prevent buttercup seeds from germinating. This isn’t a magic bullet, but it reduces the problem significantly. I’ve found that regular dethatching in spring also helps—it removes thatch where buttercup seeds often hide.
🌿 Step 5: Monitor and Repeat as Needed
Buttercups are persistent, so I check my lawn weekly in spring for new sprouts. If I spot any, I pull them immediately before they mature. Over time, a healthy lawn crowds out buttercups naturally. I’ve seen dramatic improvements after 2-3 seasons of consistent effort—my lawn went from 80% buttercups to barely a few stragglers.
Real talk: It’s a marathon, not a sprint. But if you stay on top of it, your lawn will thank you. I promise, the first time you see a solid green patch where buttercups once ruled, it’s worth every pull.
Tips & tricks for perfect buttercup removal
Here's what nobody tells you about actually eliminating buttercups for good.
Timing is Everything: Those late February to April windows aren't just suggestions—they're critical. Buttercups spread through seeds, and once they flower, you're basically fighting a losing battle. I've learned this the hard way after seeing buttercups return in force the following spring. If you spot them in summer, don't panic—just focus on removal while maintaining lawn health for next season's prevention battle.
Root Extraction Technique: The secret to permanent removal is getting every last bit of root. When you pull, wiggle gently while applying steady upward pressure—think of it like unscrewing a stubborn lid. I've found that working in 2x2 foot sections prevents missing hidden roots while keeping the process manageable. And always use a trowel to clean up any broken root fragments. Trust me, those tiny pieces will grow back into full plants.
Seasonal Prevention Strategy: Fall is your secret weapon. Applying corn gluten meal as a pre-emergent herbicide creates a natural barrier against next year's buttercup seeds. Combine this with regular dethatching in spring to remove thatch where seeds often hide. I've seen lawns transform completely after just two seasons of this consistent approach—my neighbor's lawn went from 70% buttercups to nearly weed-free after implementing this routine.
Pro Tips for Remove Buttercups From Lawn
- Here's what nobody tells you about actually eliminating buttercups for good.
- Timing is Everything: Those late February to April windows aren't just suggestions—they're critical. Buttercups sprea...
- Root Extraction Technique: The secret to permanent removal is getting every last bit of root. When you pull, wiggle g...
Frequently asked questions
Got questions about tackling buttercups? You’re not alone!
Here are the most common concerns—and straightforward answers—to help you reclaim your lawn with confidence.
When is the best time to pull buttercups?
The ideal window is early spring (March–April) or late summer/early fall (August–September). Why? Young buttercups are easier to remove before their deep roots establish, and their blooms haven’t yet seeded. Pro tip: Pull on a dry, sunny day—soil is firmer, and roots pop out cleaner!
Will vinegar or other herbicides work?
Yes! A 3% acetic acid vinegar solution (1:1 vinegar-to-water ratio) sprayed directly on leaves kills buttercups. For stubborn patches, a glyphosate-based herbicide (like Roundup) works too—but test a small area first. Warning: Avoid spraying on windy days to protect nearby plants!
What if buttercups keep coming back?
Persistent buttercups often mean poor soil health or compacted turf. Fix it by:
- Core aerating your lawn (rent a machine or hire a pro).
- Top-dressing with compost to improve drainage.
- Seeding bare spots with dense grass varieties (like Kentucky bluegrass) to outcompete weeds.
Patience is key—it may take 1–2 seasons to see full results.
Can I just mow buttercups away?
Mowing alone won’t eliminate them—it actually encourages spread by triggering seed release. However, regular mowing (3–4” height) weakens buttercups over time. Pair it with manual removal or herbicide for best results. Think of mowing as a long-term deterrent, not a cure!
Are buttercups toxic to pets or kids?
Buttercups contain irritating sap that can cause skin rashes or mouth irritation if ingested. While not deadly, they’re best removed to avoid accidental contact. Wear gloves when pulling, and supervise kids/pets in treated areas until the plants decompose (usually 1–2 weeks).
Bonus Tip:
Mark buttercup spots with flags or chalk to track progress—you’ll be amazed how many you’ve removed after just a few weeks!
Wrapping up and next steps
Removing buttercups from your lawn takes patience, the right tools, and a bit of elbow grease—but the results will be worth it! 🌱 By following these steps—whether you choose hand-pulling, vinegar treatments, or mulching—you’ll reclaim a lush, weed-free lawn. Start small, stay consistent, and soon your grass will thrive without those pesky yellow blooms.
Ready to take action? Grab your gloves, pick a sunny day, and begin tackling those buttercups one patch at a time! Your future lawn will thank you.