
Lawn
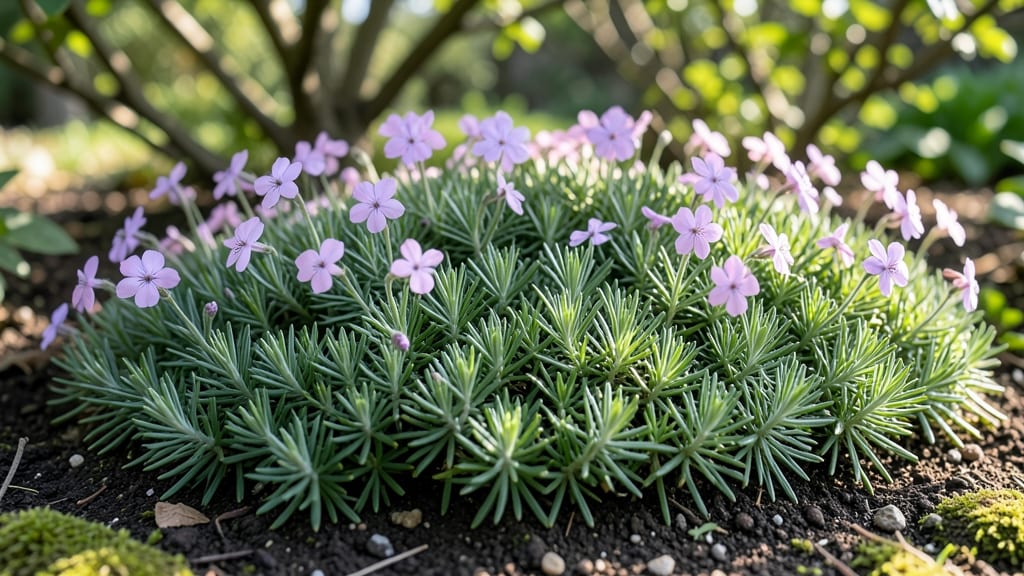
A creeping phlox lawn transforms dull grass into a fragrant, evergreen carpet bursting with spring color. 🌸 I fell for it after seeing how it softened my neighbor’s rocky slope—now I’m hooked on its low-maintenance beauty and year-round appeal. The key? Planting it right for maximum impact and minimal effort.
This ground cover thrives in sun or partial shade, handles drought once established, and spreads effortlessly to crowd out weeds. Pair it with evergreen sedum for winter texture or salvia for summer blooms—both love the same growing conditions. The result? A lawn that stays lush all season without mowing.
By late spring, you’ll have a sea of blooms in shades of pink, purple, or white that last for weeks. Even after flowering, the foliage stays dense and green, making it perfect for pathways, slopes, or as a living mulch under shrubs.
Just avoid heavy foot traffic—it’s delicate underfoot but tough as nails otherwise.
Works best in Zones 3-8, though varieties like ‘Sherwood Purple’ handle heat and humidity. For slopes, use erosion-control matting until roots establish. Once it’s in, you’ll wonder why you ever kept grass. Let’s get planting!
📚 In This Guide
- What you need
- Instructions
- Tips and common mistakes
- Wrapping up and next steps
What you need
- ● Creeping phlox plants: 15–20 plants per 100 sq. ft. (choose Phlox subulata varieties like 'Mandy,' 'Pink Flamingo,' or 'Sherwood Purple').
- ● Topsoil or well-draining potting mix: 2–3 cubic yards (for a 10’x10’ area).
- ● Compost or organic fertilizer: 1–2 bags (5–10 lbs each) for nutrient-rich soil.
- ○ Mulch (optional but recommended): 2–3 bags of shredded bark or pine needles (2–3 cubic feet).
- ● Garden shovel or spade (for digging).
- ● Garden rake (to level soil).
- ● Wheelbarrow (for transporting soil/mulch).
- ● Garden hose with spray nozzle (for watering).
- ● Pruners or shears (for trimming after blooming).
- ● Garden gloves (to protect your hands).
- ● A sunny or partially shaded lawn area (6+ hours of sunlight daily for best blooms).
- ● Well-draining soil (amend clay soil with sand or compost).
- ● Time to prep soil 2–4 weeks before planting (for ideal conditions).
- ● Slow-release fertilizer (e.g., Osmocote) for long-term nourishment.
- ● Landscape fabric (to suppress weeds before planting).
- ● Drip irrigation system (for consistent watering).
- ● Edging tools (to define borders neatly).
How to establish a lush creeping phlox ground cover
This hardy perennial transforms bare spots into a fragrant, evergreen carpet that thrives year after year.
🌱 Step 1: Prepare the Soil and Site
Creeping phlox thrives in well-draining soil with a pH between 6.0 and 7.0. Work in 2-3 inches of compost to loosen the soil and improve fertility, breaking up any compacted areas with a garden fork. This plant tolerates poor soil but blooms most prolifically when amended with organic matter.
Choose a location with full sun to partial shade—at least 6 hours of direct sunlight daily. While phlox handles some shade, vibrant blooms require ample light. Mark the area with stakes to visualize the spread, as mature plants can reach 12-18 inches wide and form dense mats.
🌱 Step 2: Plant Bare-Root or Container-Grown Phlox
For bare-root plants, soak the roots in lukewarm water for 30 minutes before planting to revive them. Dig holes slightly wider than the root ball and 1 inch deeper than the plant’s current soil line. Space plants 12-18 inches apart—closer spacing encourages faster ground cover but may require thinning later.
If using container-grown phlox, remove the plant gently, loosen the root ball, and place it in the hole at the same depth it was growing before. Backfill with native soil, pressing lightly to eliminate air pockets. Water deeply to settle the soil and encourage root contact.
💧 Step 3: Water and Mulch for Establishment
Keep the soil consistently moist but not soggy for the first 4-6 weeks after planting. Water deeply 2-3 times per week, aiming for 1 inch of water per week, unless rainfall provides sufficient moisture. Overwatering can lead to root rot, while underwatering stresses young plants.
Apply 2-3 inches of mulch (such as shredded bark or pine straw) around each plant, keeping it 2 inches away from the stems to prevent rot. Mulch conserves moisture, regulates soil temperature, and suppresses weeds—critical for phlox’s early growth. Replenish mulch annually as it breaks down.
☀️ Step 4: Fertilize and Maintain for Year-Round Health
In early spring, apply a balanced, slow-release fertilizer (10-10-10) at ½ the recommended rate to encourage lush foliage and abundant blooms. Avoid high-nitrogen fertilizers, which promote leafy growth at the expense of flowers. Phlox is low-maintenance but appreciates a light feeding in fall with a low-phosphorus fertilizer to support root development.
Deadhead spent blooms in early summer to encourage a second flush of flowers and prevent seed formation, which can weaken the plant. Trim back faded foliage in late summer or early fall to 2-3 inches above ground level, allowing new growth to emerge in spring. This rejuvenation step prevents woody stems and keeps the plant vigorous.
⏰ Step 5: Monitor and Adjust for Long-Term Success
Watch for signs of stress, such as yellowing leaves (often a sign of overwatering or nutrient deficiency) or pale stems (indicating insufficient sunlight). Phlox is drought-tolerant once established but may need additional watering during prolonged dry spells. If leaves scorch in hot climates, provide afternoon shade temporarily.
Divide mature clumps every 3-4 years in early spring or fall to maintain vigor. Dig up sections of the plant, separate into smaller clumps, and replant immediately. This prevents overcrowding and rejuvinates the lawn’s density. With proper care, your creeping phlox will spread naturally, creating a low-maintenance, evergreen ground cover that blooms beautifully for decades.
Tips & tricks for perfect creeping phlox ground cover
Common pitfalls—and how to sidestep every one—when creating your dream fragrant lawn.
Soil Preparation Secret: Before adding compost, test your soil's pH using a simple kit from your garden center. If your soil tests below 6.0, amend with crushed limestone (about 2 pounds per 100 square feet) and mix it into the top 6 inches of soil. This adjustment is crucial because phlox won't thrive in acidic conditions, and the effort pays off with vibrant blooms. I've seen gardens where homeowners skipped this step and ended up with pale, sparse growth—don't make that mistake!
Planting Depth: The 1-inch deeper planting depth mentioned in Step 2 might seem counterintuitive, but it's essential for anchoring the plant. When you plant too shallow, the roots can dry out quickly, especially in hot climates. To check depth, use a small ruler or measure from the soil line to the top of the root ball. This small detail makes a big difference in establishment success—trust me, I've seen too many newly planted phlox struggling because they weren't buried deep enough.
Watering Wisdom: Those first 4-6 weeks after planting are critical for root development. I recommend using a moisture meter to verify soil moisture rather than relying on memory. The soil should feel like a damp sponge—not soggy, not dry. In hot weather, you might need to water daily rather than every 2-3 days. The goal is consistent moisture without waterlogging, which can lead to root rot. A drip irrigation system set on a timer works wonders for maintaining this balance without overwatering.
Fertilizer Timing: When applying that half-rate 10-10-10 fertilizer in early spring, time it with your first watering of the season. This ensures the nutrients get carried directly to the roots rather than sitting on the soil surface. For the fall feeding, I've found that a light application of compost (about 1 inch) works just as well as fertilizer and adds organic matter to the soil. The key is to avoid heavy feeding in late summer, as this can stimulate tender new growth that won't survive winter frosts.
Pro Tips for Creeping Phlox Lawn
- Common pitfalls—and how to sidestep every one—when creating your dream fragrant lawn.
- Soil Preparation Secret: Before adding compost, test your soil's pH using a simple kit from your garden center. If yo...
- Planting Depth: The 1-inch deeper planting depth mentioned in Step 2 might seem counterintuitive, but it's essential ...
Frequently asked questions
Got questions about creating a stunning creeping phlox lawn? You’re not alone! Here are answers to the most common queries to help you grow a lush, low-maintenance ground cover with ease.
How do I prepare my soil for creeping phlox?
Creeping phlox thrives in well-draining soil with a pH between 6.0 and 7.0. Before planting, loosen the soil to a depth of 6–8 inches, mix in 2–3 inches of compost, and remove weeds or grass. Avoid heavy clay—amend with sand or organic matter if needed. Pro tip: Test your soil’s pH with a kit to ensure optimal conditions!
When is the best time to plant creeping phlox?
The ideal planting window is early spring or early fall, when temperatures are mild (50–70°F). This gives roots time to establish before extreme heat or cold. Spring planting ensures blooms the first year, while fall planting allows roots to strengthen over winter. Avoid planting in peak summer or deep freeze!
How do I keep creeping phlox from spreading too aggressively?
While creeping phlox is low-maintenance, it can spread quickly. To control its growth:
- Trim back 1/3 of the foliage after blooming to encourage denser growth.
- Use a sharp edging tool to define borders if needed.
- Space plants 12–18 inches apart to reduce competition.
What pests or diseases commonly affect creeping phlox?
Creeping phlox is generally pest-resistant, but watch for:
- Slugs/snails (use beer traps or diatomaceous earth).
- Powdery mildew (improve airflow, avoid overhead watering).
- Japanese beetles (handpick or use neem oil).
Can I use creeping phlox as a replacement for grass?
Creeping phlox makes an excellent grass alternative—it’s drought-tolerant, low-maintenance, and stays green year-round (in mild climates). However, it won’t handle heavy foot traffic like turfgrass. For high-traffic areas, pair it with moss or clover for a hybrid solution. Bonus: It blooms in spring, adding color without mowing!
Wrapping up and next steps
Transforming your lawn into a lush, low-maintenance creeping phlox carpet is simpler than you think—and the rewards are stunning! 🌸 With its vibrant spring blooms, drought tolerance, and year-round ground cover, this hardy plant is a game-changer for any yard.
Whether you're tackling a shady spot or brightening up a sunny patch, creeping phlox delivers beauty with minimal effort.
Ready to dive in? Start small—pick a sunny or partially shaded area, gather your supplies, and follow the steps to plant and care for your new lawn. Before you know it, you’ll be the envy of the neighborhood with a blooming, green masterpiece that thrives all year long! 🌿✨