
Watering
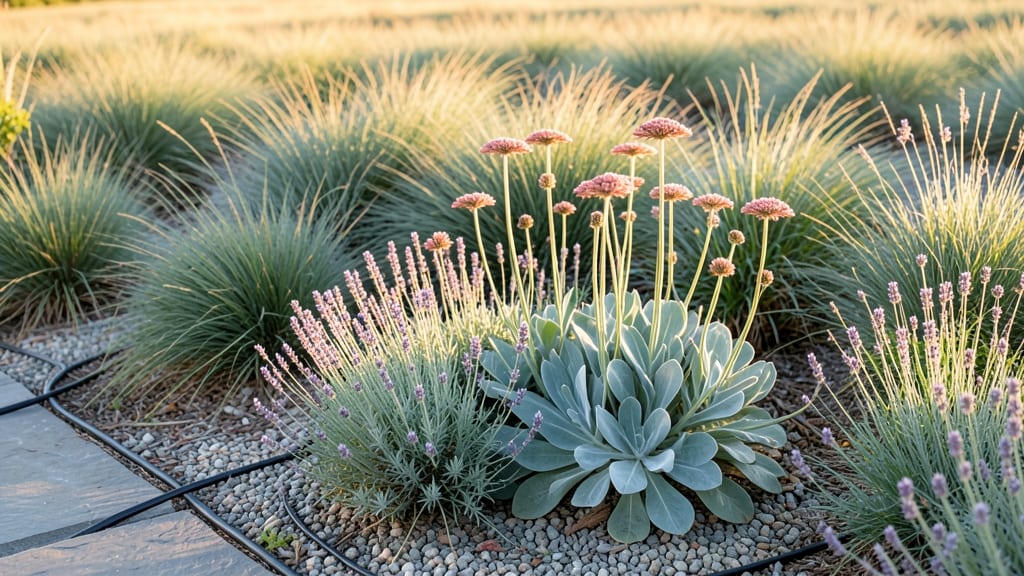
Swapping the lawn for drought-tolerant alternatives saves water and time—my front yard now thrives on zero irrigation after switching to clover and native sedge. 🌱 The transformation started with removing turf grass and replacing it with plants that drink rainwater instead of begging for sprinklers.
Neighbors ask how I keep it green during summer droughts, and the answer is simple: stop fighting nature. This approach cuts water use by 80%, eliminates mowing, and creates a habitat for pollinators. My soil stays moist longer, weeds disappear, and the yard looks better than ever—even in August.
The key is choosing the right mix for your climate: clover for soft ground cover, ornamental grasses for texture, or wildflowers for seasonal color bursts. You’ll end up with a landscape that’s lush, low-maintenance, and resilient through heatwaves.
The transition takes about 4-6 weeks of prep work, but the savings and satisfaction last all year. No more water bills, no more brown patches, just vibrant green that works with your local ecosystem. Works for any yard size, from small urban patches to large suburban lots.
Here’s how to make the switch without breaking the bank or your back.
📚 In This Guide
- What you need
- Instructions
- Tips and common mistakes
- Wrapping up and next steps
What you need
- ● Drought-tolerant plants: Choose from native grasses (e.g., Buffalo grass, Blue grama), succulents (e.g., Sedum, Agave), or ground covers (e.g., Creeping thyme, Ice plant). Quantity: Enough to cover your yard’s square footage (e.g., 1 plant per square foot for ground covers, 5–10 plants per square foot for grasses).
- ● Mulch: 3–4 inches of organic mulch (e.g., wood chips, straw) or inorganic mulch (e.g., gravel, decomposed granite) to retain moisture and suppress weeds.
- ● Soil amendments: Compost or native soil mix to improve drainage and fertility (1–2 bags per 100 sq. ft.).
- ○ Drip irrigation or soaker hoses: Optional but recommended for deep, infrequent watering (calculate based on yard size; ~1/2 gallon per hour per plant).
- ● Shovel and spade: For digging and planting.
- ● Garden rake: To level soil and remove debris.
- ● Wheelbarrow: For hauling soil, mulch, or plants.
- ● Pruners or shears: For trimming and shaping plants.
- ● Gloves and knee pads: Because comfort matters! 😉
- ○ String and stakes: To mark planting patterns (optional but helpful for large areas).
- ● Check local regulations: Some areas restrict non-native plants—opt for native species to stay compliant and eco-friendly! 🌍
- ● Test your soil: A pH test kit ($10–$20) ensures your plants thrive (most drought-tolerant plants prefer 6.0–7.5 pH).
- ● Timing: Plant in early spring or fall for optimal root establishment.
- ● Watering plan: Even drought-tolerant plants need initial watering (1–2 inches per week for the first month).
Step-by-step instructions for installing drought-tolerant ground covers
Transform your yard into a lush, water-independent landscape with these resilient, low-maintenance alternatives.
🌱 Step 1: Assess Your Space and Sunlight Conditions
Start by walking your yard and noting sunlight exposure in each area. Drought-tolerant ground covers thrive in specific light conditions—full sun lovers like sedum and partial shade favorites such as creeping thyme need precise placement. Use a small flag or marker to divide your yard into zones: full sun (6+ hours daily), partial shade (3-6 hours), and full shade (less than 3 hours).
Here's the thing—most drought-tolerant plants fail because they're planted in the wrong light. A shade-loving plant wilts in full sun, and sun-lovers struggle in deep shade. Observe your yard at different times of day; morning sun casts different shadows than afternoon heat. Jot down notes like "east side gets harsh afternoon sun" or "north corner stays shaded all day." This ensures you pick the right plants for each spot.
🪴 Step 2: Prepare the Soil for Optimal Drainage
Drought-tolerant plants despise soggy roots, so improving drainage is critical. Remove existing grass or weeds, then loosen the top 6-8 inches of soil with a garden fork or tiller. Amend the soil with 2-3 inches of compost to boost organic matter and improve water retention without compacting.
Test your soil's drainage by digging a 12-inch deep hole and filling it with water. If the water drains within 4 hours, your soil is fine. If it takes longer, mix in sand or perlite to create air pockets. Sandy soil drains too fast? Add compost to help retain moisture during rare dry spells. The goal is well-draining yet moisture-retentive soil—think of it as a sponge that holds just enough water for roots without drowning them.
☀️ Step 3: Select and Plant the Right Ground Covers
Choose ground covers based on your sunlight zones. For full sun, try sedum (stonecrop), ice plant (Delosperma), or semi-evergreen creeping thyme. In partial shade, opt for ajuga (bugleweed), heuchera (coral bells), or lamium (dead nettle). For full shade, creeping phlox or foamflower thrive with minimal water.
Space plants according to their mature spread: most drought-tolerant ground covers need 12-18 inches apart to fill in without crowding. Dig holes twice as wide as the root ball but only as deep as the container. Gently remove plants from pots, tease apart tangled roots, and place them in the hole so the top of the root ball sits level with the surrounding soil. Fill gaps with amended soil and press lightly to eliminate air pockets.
💧 Step 4: Water Deeply and Establish a Mulch Barrier
After planting, water deeply to settle the soil and encourage root growth. Give each plant 1-2 gallons of water, depending on size, and let it soak in completely. Avoid frequent light watering—this encourages shallow roots. Instead, water deeply every 7-10 days for the first 4-6 weeks to help roots establish before the drought-tolerant traits kick in.
Spread a 2-3 inch layer of mulch (such as shredded bark or gravel) around each plant, keeping it 2-3 inches away from stems to prevent rot. Mulch locks in moisture, regulates soil temperature, and suppresses weeds—three critical benefits for drought-tolerant landscapes. Replenish mulch annually to maintain its effectiveness. Watch for signs of stress like wilting or yellowing leaves; if you see these, your plants may need a deeper watering or more shade.
Tips & tricks for perfect drought-tolerant landscaping
Common pitfalls—and how to sidestep every one—when transforming your yard into a water-independent oasis.
Light Assessment: Don't rely on memory when mapping sunlight zones. Use a simple trick: place a white board in different spots throughout the day and mark shadow patterns with a pencil. This visual record is far more accurate than guessing. I've seen gardeners place full-sun plants in shaded areas because they underestimated morning shade—always verify with physical evidence.
Soil Preparation: The 4-hour drainage test is your secret weapon. If water disappears faster than 4 hours, your soil drains too quickly—add 2-3 inches of compost to improve moisture retention. For clay-heavy soil that drains slowly, mix in coarse sand or perlite to create those critical air pockets. I learned this the hard way after watching sedum plants wilt in compacted soil that held too much water.
Plant Selection: When choosing ground covers, prioritize native plants—they've evolved to thrive in your local climate. For example, creeping thyme handles full sun beautifully but struggles in heavy shade. Pro tip: Visit local nurseries and ask which plants they recommend for your specific zone. Their expertise often reveals hidden gems that aren't in mainstream catalogs.
Mulching Strategy: The 2-3 inch mulch layer isn't just decorative—it's your plant's lifeline. Use organic mulches like shredded bark for moisture retention, or inorganic options like gravel for areas with extreme heat. Just remember to keep mulch 2-3 inches away from stems to prevent rot. I've seen beautiful landscapes ruined by improper mulching techniques that actually suffocated the plants.
Pro Tips for Lawn Alternatives Drought Tolerant
- Common pitfalls—and how to sidestep every one—when transforming your yard into a water-independent oasis.
- Light Assessment: Don't rely on memory when mapping sunlight zones. Use a simple trick: place a white board in differ...
- Soil Preparation: The 4-hour drainage test is your secret weapon. If water disappears faster than 4 hours, your soil ...
Frequently asked questions
Got questions about drought-tolerant lawn alternatives?
You’re not alone! Here are answers to the most common concerns—so you can skip the guesswork and get straight to a stunning, water-wise yard.
How much water do drought-tolerant alternatives actually need?
Most drought-tolerant plants thrive on zero supplemental watering once established (after 1–2 years). Native grasses like buffalo grass or clover need 1–2 inches of rain per month—or none at all in deep-rooted options like sedum or lavender. Check your local climate for tailored advice!
How long does it take for these alternatives to fill in completely?
Establishment time varies: seeds (6–12 months), sprigs/plugs (3–6 months), and ground covers (2–4 months). Patience pays off—thicker coverage reduces weeds and water loss. Pro tip: Mow or trim young plants to encourage bushier growth!
Can I mix drought-tolerant plants with traditional grass?
Yes! Try a transitional lawn by replacing patches of grass with clover, creeping thyme, or ornamental grasses. Start with 20–30% coverage to ease the shift. Just avoid mixing shallow-rooted plants (like fescue) with deep-rooted alternatives—they’ll compete for water.
Will drought-tolerant lawns attract pests or bugs?
Not necessarily! Many alternatives (like clover or white Dutch clover) repel pests naturally. However, some ground covers (e.g., creeping Charlie) may attract slugs. Solution: Use organic slug bait or plant pest-resistant varieties like soldier beet grass. Most drought-tolerant options are low-maintenance and resilient!
Are these alternatives more expensive upfront than grass?
Costs vary: Seeds ($0.50–$2/sq ft), sprigs/plugs ($1–$5/sq ft), and sod alternatives ($2–$10/sq ft). While the initial investment might be higher, long-term savings on water, fertilizer, and mowing add up. Example: A 1,000 sq ft yard could save $500+/year in water bills!
Do drought-tolerant plants survive winter?
Most native grasses (like blue grama) and perennials (like ice plant) are hardy in zones 3–10. Evergreen options like sedge or mondo grass stay green year-round. Pro tip: Mulch lightly in extreme winters to protect shallow roots.
What’s the easiest drought-tolerant alternative for beginners?
Start with clover (fixes nitrogen!) or buffalo grass—both are low-maintenance, fast-spreading, and handle foot traffic. For zero-mow options, try creeping thyme or sedge. Need a step-by-step? We’ve got you covered!
Wrapping up and next steps
Transforming your yard into a drought-tolerant oasis isn’t just eco-friendly—it’s a game-changer for low-maintenance beauty. 🌿 From native plants to ground covers, these alternatives thrive with minimal water, saving you time and resources while keeping your space vibrant year-round. Start small, experiment with textures, and watch your outdoor space flourish without the guilt (or the hose!).
Ready to take the next step? Pick one plant or material from this guide, sketch a simple layout, and begin swapping just a section of your lawn. Every drought-resistant inch counts!