
Lawn
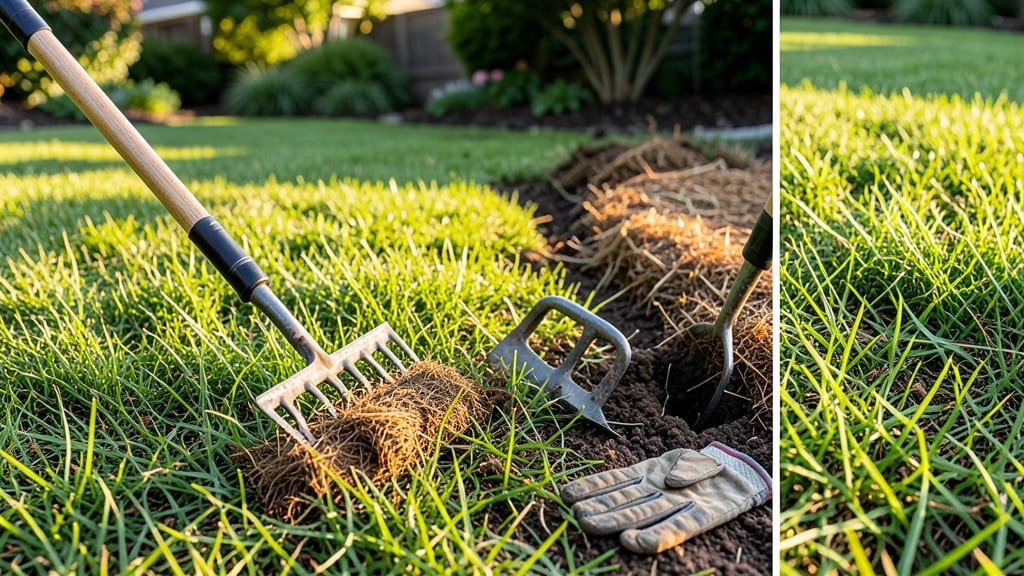
A thick layer of thatch can strangle your lawn's roots, and a DIY lawn dethatcher is the most cost-effective way to fix it. ✂️ I’ve used homemade dethatchers for years—my first one took just $20 in scrap metal and a weekend—and they work just as well as store-bought models if not better.
The key is timing: tackle it in early spring or fall when grass is actively growing but not stressed. A simple setup with a rake, garden fork, or even a wooden board can loosen thatch effectively without damaging roots. Just avoid doing this in summer heat or drought.
You’ll see softer, spongier soil and grass that roots deeper, plus fewer weeds and pests. The best part? You skip the rental fees and get a tool tailored to your yard’s size. For beginners, start small—test a 3’x3’ patch first.
Overdoing it can harm grass, so focus on ¼” to ½” of thatch removal max. Here’s how to build one that actually works.
📚 In This Guide
- What you need
- Instructions
- Tips and common mistakes
- Wrapping up and next steps
What you need
- ● Dethatching tool: Manual: Lawn rake (bow rake with stiff tines, 12–18 inches wide) or spring-tine rake
- ● DIY alternative: Heavy-duty rake with bent tines (or repurpose a garden fork)
- ● Power: Electric or gas-powered dethatcher (rental or purchase, 18–24 inches wide)
- ● Safety gear: Work gloves (heavy-duty, cut-resistant)
- ● Safety goggles
- ○ Knee pads (optional but helpful!)
- ● Prep supplies: Garden hose with nozzle (for wetting the lawn)
- ● Lawn mower (set to high for pre-dethatching mow)
- ● Cleanup: Heavy-duty trash bags (for debris)
- ● Wheelbarrow or tarp (to collect thatch)
- ● String trimmer (for edges and tight spots)
- ● Lawn aerator (if your thatch layer is over ½ inch thick)
- ● Overseeding mix (to reseed bare spots after dethatching)
- ● Broadcast spreader (for even seed distribution)
- ● Soil test kit (to check pH/nutrients post-dethatching)
Step-by-Step instructions for DIY lawn dethatching
Here's how I tackle thatch removal without renting expensive equipment—just the right tools and timing.
🪴 Step 1: Choose the Right Season and Conditions
Timing matters more than you'd think. I always dethatch in late spring or early fall when temperatures hover between 50-75°F. This gives your grass time to recover before summer heat stress or winter dormancy. Avoid dethatching in winter when grass is dormant or during summer drought—you'll shock the lawn.
Check your lawn for signs of thatch buildup first: if you see a spongy layer thicker than ½ inch between grass blades and soil, it's time. Run your fingers through the grass—if you feel a dense mat rather than loose soil, that's your cue. Wait for a dry day after rain so the soil isn't waterlogged.
✂️ Step 2: Gather Your DIY Tools
You don't need fancy equipment—just a few key tools. Grab a stiff rake (like a dethatching rake with wire teeth) or a lawn scarifier if you have one. I also recommend garden shears for stubborn patches and a broom to clean up debris. Wear gloves and closed-toe shoes—this job gets messy.
Skip the lawnmower blades for dethatching. They'll tear grass instead of removing thatch. If your lawn is heavily compacted, rent a manual dethatching machine for large areas. For small patches, a handheld rake works perfectly. The key is to work with the grain of the grass first, then crosswise to loosen thatch completely.
🌱 Step 3: Loosen and Remove Thatch in Sections
Start at one end of the lawn and work in 3-4 foot wide strips. Use the rake to lift and comb through the grass, pulling the thatch layer upward. You'll feel resistance at first—that's normal. Aim to remove about ½ inch of thatch total, not all at once. Overdoing it exposes soil and stresses grass roots.
For stubborn areas, use the garden shears to snip thick thatch mats at the base. Work slowly—rushing leads to uneven removal and torn grass. After each strip, use the broom to sweep up debris and keep the area clear. This prevents clogging your tools and makes the next section easier. Stop if you hit soil—you've gone too deep.
💧 Step 4: Aerate and Fertilize for Recovery
Once you've removed the thatch, aerate the lawn with a core aerator or even a garden fork to create ¼ inch deep holes every 3-4 inches. This helps water and nutrients reach the roots. I like to do this right after dethatching while the soil is loose. For small lawns, push a fork down firmly and wiggle it to create holes manually.
Apply a light layer of compost or slow-release fertilizer over the aerated areas. This gives your grass the nutrients it needs to recover. Water deeply (1 inch of water) immediately after to help settle everything. Avoid heavy foot traffic for 48 hours—let the grass blades recover and stand upright before mowing.
☀️ Step 5: Maintain and Monitor Progress
Mow your lawn higher than usual for the next two weeks—set your mower to 3-4 inches to protect new growth. This helps shade the soil and retain moisture. Watch for yellowing grass in patches—this is normal as the lawn recovers, but if large areas stay yellow after a week, you may have gone too deep during dethatching.
Repeat the process annually for heavily thatched lawns, or every 2-3 years for maintenance. I mark my calendar for early May or September each year to stay consistent. The first few times, you'll see more debris—over time, your lawn will develop a healthier balance between grass and soil.
Tips & tricks for perfect DIY lawn dethatching
These simple tricks will help you avoid common pitfalls and get professional results without renting expensive equipment.
Seasonal Timing Secret: The 50-75°F window in late spring or early fall isn't just arbitrary—it's when grass grows most actively. I always check the 10-day forecast before scheduling my dethatching day. If temperatures dip below 50°F or climb above 75°F, I reschedule. This temperature range gives your lawn the perfect balance of recovery time without summer heat stress or winter dormancy.
Tool Technique That Changed Everything: When using your stiff rake in Step 3, angle the teeth slightly downward as you drag through the grass. This creates more leverage to pull up thatch without tearing grass blades. For stubborn areas, I found that working in the same direction three times (rather than just once) loosens thatch more effectively. The key is persistence—don't give up if the first pass doesn't remove everything.
Recovery Strategy: That 48-hour no-foot-traffic rule in Step 4 is non-negotiable. After aerating, I like to place small wooden planks across the lawn to create walkways. This prevents compaction while still allowing me to monitor progress. You'll notice the grass blades start standing upright again within 24 hours—this is your sign that recovery is beginning. If you can't resist walking on it, at least wear soft-soled shoes to minimize impact.
Maintenance Hack: Mark your calendar for early May and September each year by setting phone reminders labeled "Dethatch Day." I also keep a small notebook where I track how much thatch I removed each year. This helps me spot trends—if I'm removing more than ½ inch annually, I know my lawn needs more frequent maintenance or different care practices.
Pro Tips for Diy Lawn Dethatcher
- These simple tricks will help you avoid common pitfalls and get professional results without renting expensive equipment.
- Seasonal Timing Secret: The 50-75°F window in late spring or early fall isn't just arbitrary—it's when grass grows most actively.
- Tool Technique That Changed Everything: When using your stiff rake in Step 3, angle the teeth slightly downward as you drag through the grass.
Frequently asked questions
Got questions about tackling thatch on your own? Here are some of the most common ones—plus straightforward answers to help you DIY like a pro!
When is the best time to dethatch my lawn?
The ideal window is late spring or early fall when grass is actively growing but not under stress. Avoid summer heat or winter dormancy—your lawn needs time to recover. For cool-season grasses (like fescue or bluegrass), aim for April-May or September-October. Warm-season grasses (like Bermuda or Zoysia) thrive with May-June or August-September dethatching.
How do I know if my lawn needs dethatching?
Check for these signs:
- Thatch layer over ½ inch thick—dig a small section to measure.
- Water ponds on your lawn instead of soaking in.
- Grass grows unevenly or looks stunted.
- Weeds or pests are more prevalent than usual.
Can I use a regular rake or string trimmer instead of a dethatcher?
While a heavy-duty rake or string trimmer can help with light thatch, they’re not ideal for deep removal. A manual dethatcher (or rental machine) ensures even, thorough work without damaging grass roots. For small areas, a bow rake works temporarily—but expect more effort and less precision.
Should I water my lawn before or after dethatching?
Water lightly 1-2 days before
to soften the thatch layer, but avoid soggy ground. After dethatching, water deeply to help roots recover. Skip heavy watering for 48 hours post-dethatch—this prevents clumping and lets grass blades stand upright for even regrowth. Think of it as a gentle hydration boost, not a soak!
What if my lawn looks patchy or bare after dethatching?
Patchiness is normal! Thin areas signal stressed grass—here’s how to fix it:
- Rake lightly to distribute seeds (if overseeding).
- Apply a slow-release fertilizer to encourage recovery.
- Keep soil moist but not waterlogged for 2-3 weeks.
- Consider sod patches for severely bare spots.
Is dethatching safe for all grass types?
Most grass types tolerate dethatching, but thin or weakened lawns may struggle. Beware of:
- Newly seeded lawns (wait 6+ months post-seeding).
- Drought-stressed grass—water first to revive roots.
- Fine fescue (more delicate; use a manual dethatcher on low settings).
Wrapping up and next steps
Transforming your lawn into a lush, healthy carpet starts with tackling thatch—and you’ve got this! 🌱 Whether you’re a seasoned DIYer or just dipping your toes into lawn care, a dethatcher is your secret weapon for spring and fall.
With the right tools, timing, and technique, you’ll breathe new life into your grass while saving money and enjoying the satisfaction of a job well done.
Ready to see the results? Start by scheduling your dethatching session during the optimal window—early spring or fall—and watch your lawn thrive. Happy digging! 🌿