
Lawn
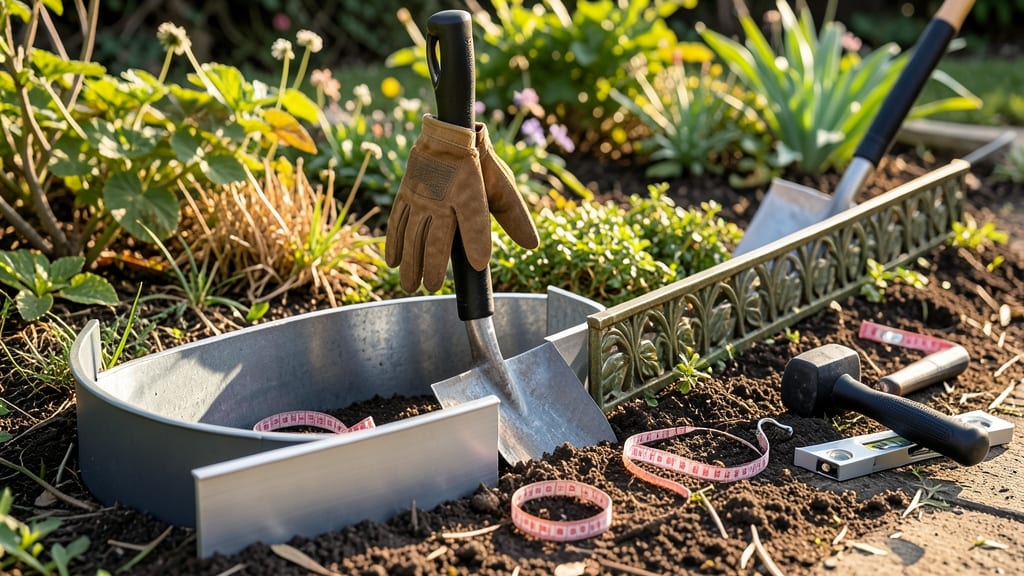
Metal lawn edging transforms a messy yard into a sharp, intentional landscape. 🌿 I’ve used wrought iron and aluminum to create borders that last decades—no more grass creeping into flower beds or uneven edges ruining my design.
The right metal edge adds structure, prevents erosion, and elevates even the simplest garden. Wrought iron offers classic elegance, while lightweight aluminum works for DIYers and curved designs. Steel blends durability with affordability, and copper develops a rich patina over time.
Each material brings a distinct look: rustic, modern, or timeless. I’ve seen metal edging turn a chaotic yard into a polished, high-end space with minimal effort. Once installed, your borders will stay crisp for years with almost no maintenance.
No more digging up old plastic or struggling with rot—just a clean line that defines your garden’s personality. The payoff? A yard that looks intentional, not improvised. Perfect for formal gardens, cottage-style plots, or even modern minimalist designs. Let’s get yours looking as good as it functions!
📚 In This Guide
- What you need
- Instructions
- Tips and common mistakes
- Wrapping up and next steps
What you need
- ● Metal lawn edging: Choose between aluminum, steel, or wrought iron (e.g., 1-inch to 3-inch height, 16–24 inches long). Calculate total length based on your lawn’s perimeter (add 10% extra for cuts/waste).
- ● Measuring tape: 25-foot tape for accurate perimeter measurements.
- ● String line or chalk: To mark edging placement before installation.
- ● Shovel or spade: For digging trenches (6–8 inches deep, 4–6 inches wide).
- ● Garden gloves: Heavy-duty to protect hands while digging.
- ● Level or straightedge: Ensures edging stays even and straight.
- ● Hammer or mallet: For securing stakes or stakes (if using).
- ○ Stakes or landscape spikes: (Optional but helpful) to anchor edging temporarily.
- ● Sand or gravel: 1–2 bags (50 lbs each) to create a stable base.
- ○ Plate compactor (optional but recommended): For compacting sand/gravel for durability.
- ● Concrete or adhesive: For permanent edging (e.g., concrete mix or landscape adhesive).
- ● Decorative caps or finials: To add a stylish topper to your metal edging.
- ● Edging cap pins: For securing caps without tools.
- ● Landscape fabric: To prevent weed growth beneath the edging.
How to install metal lawn edging for a clean, professional look
Metal edging transforms any yard—here’s how to install it like a pro, with sharp lines and lasting durability.
🪴 Step 1: Mark and Measure Your Lawn Border
Start by walking your garden bed’s perimeter with a hula hoop or garden hose to visualize the curve. Use a measuring tape to mark straight sections with wooden stakes every 3 feet—this keeps your cuts precise. For curves, bend the hose to follow natural lines, then transfer those curves to the ground with spray paint. I always double-check measurements before cutting, because once you dig, there’s no going back.
Pro tip: Use a string line for long straight sections. Stretch it taut between stakes, then adjust until it’s perfectly level. If your yard slopes, angle the edging slightly to follow the grade—this prevents water pooling behind the border. Mark the exact placement of each stake with a pencil or nail so you know where to dig.
✂️ Step 2: Cut the Metal Edging to Fit
Lay out your metal edging strips along the marked line and use a hacksaw or tin snips to cut them to length. Measure twice—metal expands in heat, so leave a ¼-inch gap at joints for expansion. For curves, cut the metal at 45-degree angles to create smooth transitions. I score the back of the metal first with a utility knife to prevent jagged edges when cutting.
Wear gloves and safety glasses—metal edges are sharp, and the sawdust can irritate your eyes. Test-fit each piece before finalizing cuts. If you’re working with interlocking metal edging, overlap the ends slightly for a seamless look. Avoid bending the metal with pliers; instead, use a rubber mallet to gently tap it into shape if needed.
💧 Step 3: Dig a Narrow Trench for Secure Placement
Dig a trench 2-3 inches wide and 3-4 inches deep along your marked line with a shovel or edging tool. The depth depends on your soil type—sandy soil needs shallower trenches, while clay holds better with deeper placement. Keep the trench uniform by checking depth with a straightedge or level every few feet. Remove rocks and roots larger than ½ inch to prevent shifting.
For slopes, angle the trench slightly uphill to help water drain away from the edging. I like to tap the bottom of the trench lightly with a mallet to create a firm base before inserting the metal. This prevents the edging from sinking unevenly over time. If you’re installing heavy-duty metal, consider adding a gravel base in the trench for extra stability.
🪴 Step 4: Position and Secure the Edging
Place the first piece of metal edging into the trench and press it firmly into the soil with your hands or a rubber mallet. For straight sections, use a level to ensure it’s perfectly plumb. For curves, bend the metal gently with channel locks—never force it, as cracks can weaken the structure. Overlap joints by 1-2 inches and secure with landscape staples or screws if needed.
Backfill the trench with native soil, tamping it down lightly as you go to eliminate air pockets. Leave the top ½ inch of the edging exposed above the soil line—this prevents it from being buried and makes future adjustments easier. If your yard gets heavy foot traffic, consider adding landscape fabric behind the edging to suppress weeds and reduce erosion.
⏰ Step 5: Finish with Mulch and Maintenance Tips
Once the edging is set, apply a 2-inch layer of mulch along the garden bed to keep weeds at bay and protect the metal from rust. Avoid wood chips with high moisture content, as they can cause rot near the metal. Water the area lightly after installation to settle the soil, but don’t overwater—soggy soil weakens the edging’s hold.
Check your edging seasonally for signs of shifting or rust. If gaps appear, press the metal back into the soil or add landscape pins for support. For saltwater or high-humidity climates, apply a clear metal sealant annually to extend the edging’s lifespan. With proper care, metal lawn edging can last 10-15 years—far longer than plastic or wood alternatives.
Tips & tricks for installing metal lawn edging like a pro
Between us, these small details make the difference between a DIY project that looks amateur and one that earns compliments from neighbors. Here's what I've learned after installing edging in yards big and small.
Precision in Step 1: When marking your border with wooden stakes every 3 feet, use a small hammer to drive them just deep enough to stay put—but not so deep they become impossible to remove later. I've found that marking the exact nail placement with a pencil before driving helps avoid crooked lines. For curves, bend your garden hose first, then transfer the shape to the ground with spray paint while keeping the hose in place. This ensures your curves stay smooth and consistent.
Cutting Technique: The 45-degree angle for curves is trickier than it looks. I recommend using a metal straightedge as a guide when cutting with tin snips—hold the straightedge against the metal at your desired angle, then cut along it. This prevents uneven edges that can snag mulch later. And remember that ¼-inch gap at joints? It's non-negotiable—metal expands in heat, and skipping this will cause buckling over time.
Trench Preparation: For slopes, I've discovered that creating a slight "V" shape in the trench bottom helps water drain better. Use your straightedge to check the angle—it should slope just enough to direct water away from the edging. When tamping the soil around the metal, work in small sections to avoid shifting the edging. A rubber mallet works better than your hands for this—it gives you more control without risking dents in the metal.
Long-Term Stability: If your yard gets heavy foot traffic, consider adding a layer of hardware cloth behind the edging before backfilling. This creates a solid barrier that prevents soil erosion and keeps the edging in place. For high-traffic areas, I also recommend using landscape staples at every joint—even if the instructions suggest screws, staples are easier to adjust later if the ground shifts.
Pro Tips for Lawn Edging Metal
- Between us, these small details make the difference between a DIY project that looks amateur and one that earns compl...
- Precision in Step 1: When marking your border with wooden stakes every 3 feet, use a small hammer to drive them just ...
- Cutting Technique: The 45-degree angle for curves is trickier than it looks. I recommend using a metal straightedge a...
Frequently asked questions
Got questions about lawn edging metal? You’re not alone! Here are some of the most common concerns—plus straightforward answers to help you make the best choice for your yard.
What are the best types of metal for lawn edging?
Metal lawn edging comes in a few popular options: aluminum (lightweight and rust-resistant), steel (durable but heavier), and copper (elegant but pricier). Aluminum is the top pick for most homeowners—it’s affordable, easy to install, and won’t corrode over time. For high-traffic areas, steel offers extra strength, while copper adds a premium look.
When is the best time to install metal lawn edging?
Install metal edging anytime your lawn is dry and workable—spring or fall are ideal. Avoid extreme heat (which can warp metal) or frozen ground (which makes digging difficult). If you’re replacing old edging, clear debris first and mark your layout before digging. Pro tip: A level tool ensures your edging stays straight!
Is metal edging more expensive than plastic or concrete?
Metal edging typically costs $1–$5 per linear foot, making it mid-range compared to plastic ($0.50–$3) and concrete ($5–$15+). The trade-off? Metal lasts decades with minimal upkeep, while plastic may crack or fade. For a balance of cost and longevity, aluminum is a sweet spot— it’s budget-friendly without sacrificing durability.
How do I install metal lawn edging without bending or warping it?
Bending or warping happens when metal is over-stressed. Use a staple gun or spikes (not nails) to secure it—nails can dent the material. For curves, bend the edging gradually with pliers or a rubber mallet. Pro tip: Dig a shallow trench (1–2 inches deep) to hide the base neatly and prevent shifting.
Will metal edging prevent weeds from growing along the border?
Metal edging doesn’t block weeds entirely, but it creates a physical barrier that makes weeding easier. Pair it with a landscape fabric or mulch behind the edging for extra weed control. Regularly check for gaps—if weeds sneak through, trim them early to avoid overgrowth. A little elbow grease now saves headaches later!
Wrapping up and next steps
Installing metal lawn edging is a game-changer for your outdoor space—it’s durable, stylish, and easy to maintain!
Whether you’re framing flower beds, pathways, or lawns, this sleek solution adds a polished finish while keeping your landscape tidy. 🌟 The key is choosing the right material, measuring carefully, and securing it properly for long-lasting results.
Ready to elevate your yard? Grab your tools, follow the steps, and enjoy a crisp, professional look that stands the test of time. Your future self (and neighbors!) will thank you.