
Fertilization
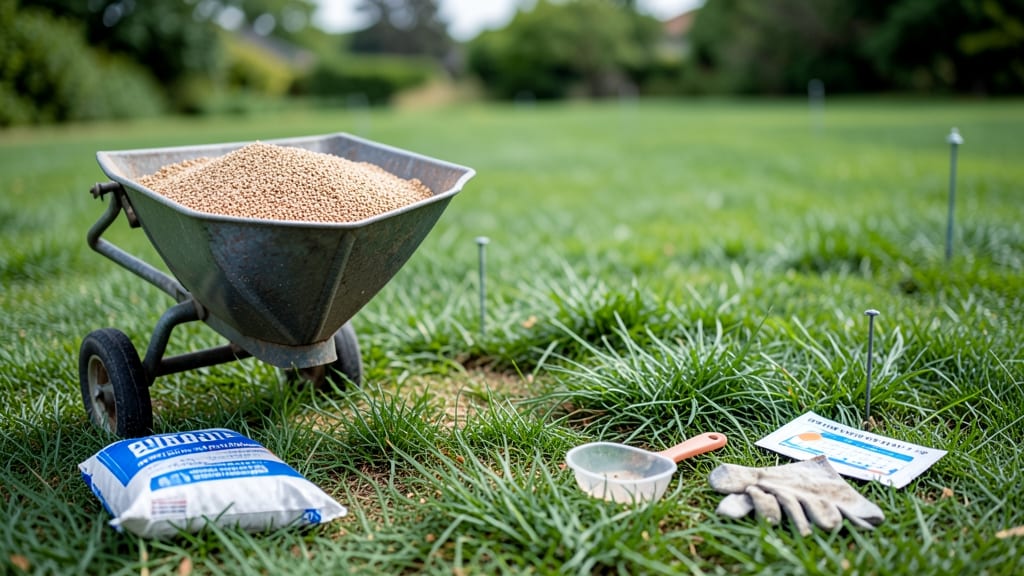
Spreading lawn fertilizer evenly is the secret to that deep, vibrant green your neighbors envy—no streaks, no patches, just uniform growth. 🌱 I learned the hard way that rushing this step leads to burnt grass or weak spots, so I perfected a method that works every time, whether you're using a broadcast or drop spreader.
The key starts with the right fertilizer for your grass type and season, then prepping the lawn by mowing it short and removing debris. A slow, overlapping pass with your spreader ensures even coverage, and checking the application rate keeps you from overdoing it.
My lawn went from patchy brown to lush in just two weeks after I mastered this. You'll end up with grass so thick and green it looks like a golf course fairway. The secret isn't just the fertilizer—it's the consistent technique that makes all the difference.
After applying, water lightly to activate the nutrients without washing them away. Works for any lawn size or grass type, from cool-season fescue to warm-season Bermuda. Here's exactly how to do it right the first time."
📚 In This Guide
- What you need
- Instructions
- Tips and common mistakes
- Wrapping up and next steps
What you need
- ● Lawn fertilizer: Granular (slow-release) or liquid (fast-acting) – choose based on your lawn’s needs (e.g., nitrogen-rich for growth, weed-and-feed for weeds)
- ● Quantity: Follow package instructions (typically 10–20 lbs per 1,000 sq ft for granular)
- ● Broadcast spreader: Drop spreader (for granular) or rotary spreader (for even distribution)
- ● Adjustable settings for spread width and rate (check manual for calibration)
- ● Measuring tools: Measuring tape or wheel (to calculate lawn area in sq ft)
- ● Calibrated spreader (pre-set or adjustable for accuracy)
- ● Safety gear: Gloves (nitrile or rubber for grip and protection)
- ● Safety goggles (to shield eyes from dust or granules)
- ● Lawn calculator app (for precise area measurements)
- ● Hose with spray nozzle (for rinsing spreader or wetting granules after application)
- ● Windbreak (e.g., stakes or flags) if spreading on windy days
- ● Knee pads (for comfort during manual spreading on small lawns)
Step-by-Step instructions for spreading lawn fertilizer evenly
Here’s my foolproof method for achieving that perfectly even, streak-free spread that keeps your lawn looking its best.
🪴 Step 1: Prepare Your Lawn and Gather Supplies
Start by mowing your lawn to a standard height—never cut more than ⅓ of the blade length at once. This ensures the fertilizer makes contact with the soil and roots where it’s needed most. After mowing, rake up any debris or clumps of grass that might block the fertilizer from reaching the soil.
Gather your supplies: a broadcast spreader (for granular fertilizer), a drop spreader (for more precision), and the fertilizer amount recommended for your lawn size. I always double-check the label for the correct application rate—too little won’t help, and too much can burn your grass. Wear gloves and long sleeves to protect your skin from any irritants in the fertilizer.
🌱 Step 2: Calibrate Your Spreader for Even Coverage
Before you spread a single granule, calibrate your spreader to ensure you’re applying the right amount. Start by setting the spreader to its recommended setting for your lawn size—usually found on the fertilizer label or spreader instructions. Then, walk a 10-foot by 10-foot square (100 square feet) and collect the fertilizer that falls outside the area in a bucket.
Weigh the collected fertilizer and compare it to the amount recommended for that square footage. For example, if the label says to apply 20 pounds per 1,000 square feet, you should collect about 0.2 pounds (or 3.2 ounces) in your 100-square-foot test area. Adjust the spreader’s settings until you hit the target weight—this ensures you’re not over- or under-applying.
💧 Step 3: Spread Fertilizer in Overlapping Rows for Uniformity
Begin spreading fertilizer along the length of your lawn, not the width, to avoid missing spots or creating streaks. Walk at a steady pace—neither too fast nor too slow. For a broadcast spreader, overlap each pass by about half the spread width to ensure no gaps. If you’re using a drop spreader, walk in straight lines with 12-inch overlaps for precision.
Keep an eye out for missed spots or uneven piles. If you notice thin areas, slow down slightly or adjust your spreader setting. I like to do a quick visual check after the first pass—if the fertilizer looks patchy, I’ll go over those areas again with a lighter hand. Watering lightly afterward helps the granules settle into the grass blades for better absorption.
☀️ Step 4: Water Immediately After Spreading
Within 24 hours of applying fertilizer, water your lawn deeply to activate the nutrients. Use about ½ to ¾ inch of water to help the granules dissolve and reach the roots. This also prevents fertilizer from blowing away or burning the grass. Early morning or late evening watering works best to reduce evaporation and give the grass time to absorb before the heat of the day.
If you’re fertilizing in hot weather, water more frequently—every few hours—to keep the soil moist. Avoid heavy watering right after spreading, though, as it can wash away the fertilizer before it’s absorbed. You’ll know you’ve done it right when the grass looks uniformly green and the soil feels evenly moist to the touch.
⏰ Step 5: Monitor and Follow Up for Best Results
After fertilizing, keep an eye on your lawn for the next 7-10 days. Healthy grass should show signs of vibrant growth, while yellowing or browning patches could mean you over-applied or missed a spot. If you notice uneven color, spot-treat those areas with a little extra fertilizer or adjust your spreader settings for the next application.
Plan your next fertilization 6-8 weeks later, following the schedule on the fertilizer label. Consistency is key—skipping steps or rushing the process can lead to weak, patchy grass. I mark my calendar with reminders so I never miss a feeding. With this method, your lawn will stay lush and green all season long.
Tips & tricks for perfect lawn fertilizer application
Here's what I've learned after years of perfecting my lawn care routine—these tricks will help you avoid common mistakes and get that professional-looking spread.
Precision Over Speed: In Step 3, when spreading fertilizer, I can't stress enough how important a steady pace is. Too fast and you'll miss spots; too slow and you'll create piles. I like to walk at about 3 miles per hour—slow enough to maintain control but fast enough to cover ground. Use a metronome app on your phone to help maintain rhythm if needed. Remember, those 12-inch overlaps for drop spreaders are critical for eliminating streaks.
Weather Watch: The 24-hour window for watering after application is non-negotiable, but timing matters even more. If you're fertilizing in hot weather, spread in the early morning when temperatures are cooler. This prevents granules from drying out too quickly and reduces the risk of burning your grass. I always check the forecast before scheduling my fertilization day—rain within 24 hours can wash away nutrients before they're absorbed.
Equipment Inspection: Before you even start, give your spreader a thorough check. In Step 2, when calibrating, make sure all parts are clean and free of debris that could clog the mechanism. I like to run my spreader through a few practice passes on pavement first to clear any initial clogs. Also, check that your spreader's settings are properly marked—some older models need adjustment knobs to be turned clockwise to increase output, while others go counterclockwise. Always follow the manufacturer's instructions.
Visual Verification: After completing your spread in Step 3, do a quick visual inspection from about 10 feet away. You should see an even, uniform coverage without any obvious gaps or piles. If you notice thin areas, go over them again with a lighter hand—don't overload those spots. This final check is where I catch most mistakes before they become problems. Think of it as your quality control step before moving to watering.
Pro Tips for Spread Lawn Fertilizer
- Here's what I've learned after years of perfecting my lawn care routine—these tricks will help you avoid common mista...
- Precision Over Speed: In Step 3, when spreading fertilizer, I can't stress enough how important a steady pace is. Too...
- Weather Watch: The 24-hour window for watering after application is non-negotiable, but timing matters even more. If ...
Frequently asked questions
When is the best time to fertilize my lawn?
The ideal times are early spring (as grass wakes from dormancy) and late fall (before winter slows growth). Avoid fertilizing during extreme heat or drought—wait for mild, moist conditions to maximize absorption. For warm-season grasses (like Bermuda), summer applications work too, but early morning or evening is best to prevent burn.
How often should I fertilize my lawn?
Most lawns thrive with 3–4 applications per year, spaced 6–8 weeks apart. Over-fertilizing harms grass and pollutes waterways, so follow the product’s recommended schedule. Slow-release fertilizers reduce frequency—check the label for specifics. Adjust based on your grass type (cool-season vs. warm-season) and local climate.
Can I use a broadcast spreader for all types of fertilizer?
Broadcast spreaders work for granular fertilizers but aren’t ideal for liquids or organic options like compost or manure. For liquids, use a hose-end sprayer; for organics, spread by hand or with a drop spreader for precision. Always calibrate your spreader first to avoid clumping or uneven coverage—test on a small area to adjust settings.
What should I do if it rains right after fertilizing?
Rain can wash away fertilizer before grass absorbs it, reducing effectiveness. If rain is forecast within 24–48 hours, delay application. If it rains immediately, reapply once the ground dries. For slow-release fertilizers, light rain (under 0.25 inches) may not be a problem, but heavy downpours will likely require a retry.
Why is my lawn turning brown after fertilizing?
Brown patches often mean over-fertilization (too much nitrogen) or drought stress post-application. Reduce watering for 24–48 hours after fertilizing to let granules dissolve slowly. If brown spots persist, test your soil pH—imbalances can block nutrient uptake. For severe cases, dilute with water or use a spreader with a uniform drop pattern next time.
Are there eco-friendly alternatives to chemical fertilizers?
Yes! Try organic fertilizers like compost, manure, or plant-based options (e.g., alfalfa meal). Slow-release options (like coated urea) reduce runoff. For DIY solutions, mix grass clippings (leave them on the lawn) or use corn gluten meal (a natural pre-emergent). Pair with proper mowing and aeration for best results.
Wrapping up and next steps
Spreading lawn fertilizer correctly is the secret to a vibrant, healthy lawn that neighbors will envy! 🌱 By choosing the right tools, measuring accurately, and applying evenly, you’ll give your grass the nutrients it needs to thrive.
Remember, consistency is key—whether you’re using a broadcast spreader, drop spreader, or hand-spreading, precision ensures no patch is missed.
Now that you’re ready to tackle the task, grab your spreader and get started! For even better results, consider testing your soil first to fine-tune your fertilizer blend. Happy gardening—your lawn will thank you! 🌿