
Mower
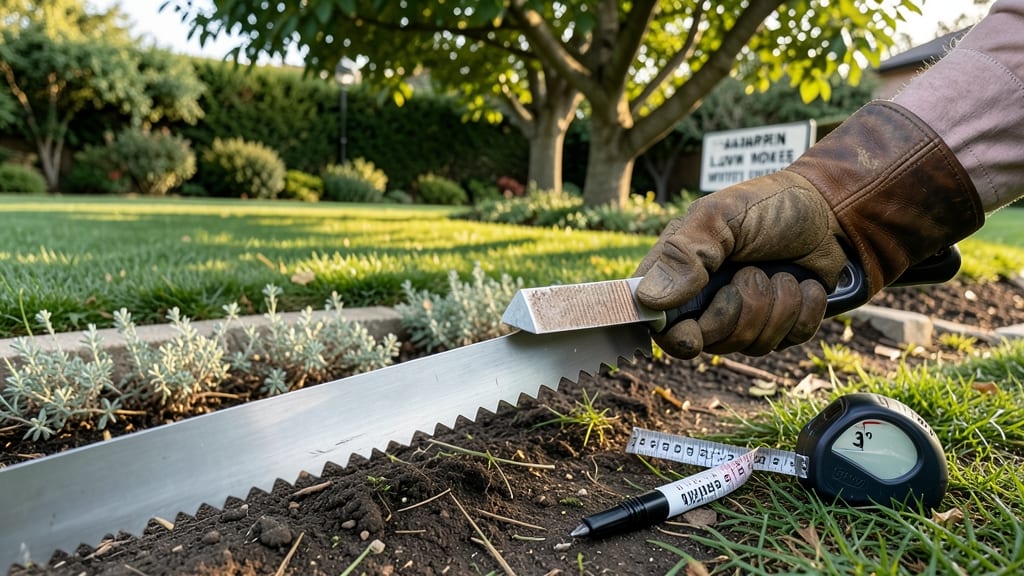
Sharpening your lawn mower blades without removing them saves hours and keeps your mower running smoothly. ✨ I've spent countless afternoons wrestling with blades that needed sharpening—until I discovered this method that works right on the mower.
The key is precision, not brute force, and it takes less than 30 minutes once you get the hang of it.
You'll need a few simple tools: a file or honing tool, safety gloves, and a sturdy work surface. The process protects your blades from warping and keeps the mower balanced.
Most people think you need to remove blades entirely, but this method works just as well—if not better—because it maintains the blade's original alignment.
By the end, your blades will cut cleaner, your lawn will look neater, and you'll avoid the hassle of removing and reattaching them. It's a game-changer for anyone tired of spending half a day on mower maintenance.
Plus, you'll extend the life of your blades, saving money in the long run.
Works for both push mowers and riding mowers, and it's especially useful if you don't have a vice or blade removal tools. Here's how to do it safely and effectively without taking anything apart.
📚 In This Guide
- What you need
- Instructions
- Tips and common mistakes
- Wrapping up and next steps
What you need
- ● Angle grinder (4.5–7-inch, 110–125mm) – Required for precision grinding. Opt for a variable-speed model (4,500–11,000 RPM) for better control.
- ● Grinding wheel – Thin-cutting (1/8"–3/16" thick) aluminum oxide or zirconia wheel (4"–7" diameter, 120–180 grit). Replace when worn beyond 1/8" thickness.
- ● Safety gear: Heavy-duty gloves (cut-resistant, ANSI A3 rated)
- ● Safety glasses (ANSI Z87.1 rated) or a full-face shield
- ● Hearing protection (30 dB NRR minimum)
- ● Long sleeves & closed-toe shoes (no sandals!)
- ○ Lawn mower blade sharpener attachment (optional but helpful) – A guide or jig designed to maintain a consistent 30°–40° angle for the blade.
- ● Clamps or vise – To secure the mower deck if the blade won’t stay still.
- ● Measuring tape or angle finder – For checking blade angles post-sharpening.
- ● Power source – Angle grinder must be corded (120V) or have a fully charged battery (18V+ for cordless).
- ● Sturdy work surface – A concrete pad, metal bench, or sawhorses to stabilize the mower.
- ● Cleaning supplies – Rag, degreaser, or brake cleaner to remove grass/oil buildup before sharpening.
- ● 💡 Check blade balance first! An unbalanced blade can cause vibrations. Spin the blade by hand—if it wobbles, stop and rebalance before sharpening.
- ● ✨ Use a blade-specific wheel – A thin, flexible wheel (like a flap disc) prevents overheating and gives cleaner edges.
- ● 🔥 Work in short bursts – Grind for 1–2 seconds per pass to avoid warping the metal from heat.
Step-by-Step instructions for sharpening lawn mower blades without removal
Skip the hassle of removing blades entirely—this method keeps your mower on the ground while restoring razor-sharp edges.
🪴 Step 1: Secure the Mower and Prepare Your Workspace
Park the mower on a flat, stable surface with the deck facing upward. I like to wedge a sturdy block of wood under the wheels to prevent rolling—nothing worse than a mower tipping mid-sharpening. Remove the spark plug wire to disable the engine, then flip the deck over so the blades face downward.
Lay down a thick towel or cardboard underneath to catch metal shavings. These tiny curls are sharp enough to cut skin, so protect your workspace. If you're working outdoors, choose a dry, wind-free day—dust and debris will dull your blade faster than you can sharpen it.
✂️ Step 2: Mark the Blade Angles for Consistent Sharpening
Use a permanent marker to draw a faint line along the edge of each blade at a 30-degree angle. This is the ideal sharpening angle for most residential mowers—too steep and you’ll create weak edges that chip, too shallow and you’ll dull the blade faster. Hold a straightedge or ruler against the blade to verify the angle before marking.
I find it helpful to rotate the blade slightly and mark multiple points along the edge. This creates reference points for when you’re honing—you’ll know exactly where to aim your file or grinder. Don’t worry if the lines aren’t perfect; we’re just giving ourselves visual cues to maintain consistency.
💧 Step 3: Use a File or Grinder to Restore the Edge
For a file method, clamp the blade securely in a vise or use a helper to hold it steady. Work the file along the marked edge at the 30-degree angle, using smooth, even strokes. Apply light pressure—you’re removing metal, not grinding it off. Stop every few strokes to wipe away shavings and check your progress.
For a power grinder, use a 40-60 grit sharpening wheel and hold it firmly against the blade edge. Move the grinder in a single direction (never back-and-forth) to avoid creating uneven ridges. You’ll feel the wheel bite into the metal—this is normal. Test the edge periodically by running your fingernail lightly along it; it should catch and resist smoothly.
☀️ Step 4: Check and Refine the Edge Uniformity
After sharpening, flip the blade over and repeat the process on the opposite side if needed. Run your fingers along the edge—you should feel a consistent burr along the entire length. If you notice uneven spots, focus extra attention there with a few more strokes.
For a final check, mow a small patch of grass. If the blade cuts cleanly with no tearing or resistance, you’ve done it right. If you feel any roughness or hear unusual noise, repeat the sharpening process. I always sharpen all blades equally—uneven edges cause uneven cutting and can damage your mower’s deck over time.
⏰ Step 5: Clean Up and Test Your Work
Wipe down the blade and deck with a clean rag to remove all metal shavings and debris. Reinstall the spark plug wire and refuel if needed. Before mowing, run the blade by hand to ensure it spins freely—no wobbling or binding. This is your final safety check before putting it to work.
After mowing for 15-20 minutes, stop and inspect the blades again. If they feel dull or show signs of wear, repeat the sharpening process. A freshly sharpened blade should last 2-3 mowings before needing attention again. The key is consistency—sharp blades mean cleaner cuts, less strain on your mower, and a healthier lawn.
Tips & tricks for precision lawn mower blade sharpening
These small adjustments will help you achieve professional-grade results while keeping your mower safely on the ground.
Angle Accuracy: That 30-degree angle in Step 2 is critical—it's the sweet spot for residential mower blades. I recommend using a protractor or angle guide for the first few times to get comfortable. Too steep (45°+) creates weak edges that chip during mowing, while too shallow (20°-) makes blades dull faster. For visual confirmation, hold a straightedge against the blade and verify the angle matches before marking.
Safety First: In Step 1, don't skip the spark plug wire removal—this is your absolute safety net. I've seen too many close calls where blades unexpectedly engaged mid-sharpening. Also, wear safety glasses when working with files or grinders; metal shavings can fly unpredictably. The thick towel or cardboard isn't just for cleanup—it's your first line of defense against sharp debris.
File Technique: When using the file method in Step 3, think "light pressure, slow strokes." I've ruined more blades than I can count by being too aggressive. Work the file in one direction only, never back-and-forth, to prevent creating uneven ridges. After every 5-6 strokes, wipe away shavings and check your progress—you should see a faint burr forming along the edge. This tells you metal is being removed properly.
Post-Sharpening Test: The 15-20 minute mowing test in Step 5 is your quality control moment. If you notice any roughness or resistance after this test, don't just keep mowing—stop immediately and re-sharpen. The difference between a freshly sharpened blade and one that needs attention is dramatic. A properly sharpened blade should glide through grass with almost no resistance, leaving clean cuts rather than torn edges.
Pro Tips for Sharpen Lawn Mower Blades Without Removing
- These small adjustments will help you achieve professional-grade results while keeping your mower safely on the ground.
- Angle Accuracy: That 30-degree angle in Step 2 is critical—it's the sweet spot for residential mower blades. I recomm...
- Safety First: In Step 1, don't skip the spark plug wire removal—this is your absolute safety net. I've seen too many ...
Frequently asked questions
Got questions about sharpening your lawn mower blades without removal? You’re not alone! Here are answers to the most common queries to help you tackle the job with confidence.
Can I really sharpen a lawn mower blade without removing it?
Yes! While removing the blade gives you full access, precision honing tools like angle guides and magnetic holders let you sharpen the blade while it’s still attached. Just ensure you secure the blade firmly to avoid slipping or uneven edges.
How often should I sharpen my mower blades without removing them?
Sharpen your blades every 25–50 hours of use (or when you notice uneven cuts or tearing grass). If you’re using a file or grinder, check them monthly for wear. Dull blades waste fuel and stress your mower’s engine.
Is it safe to sharpen a mower blade without removing it?
Absolutely—if done carefully. Always disconnect the spark plug, use a stable work surface, and wear gloves. Avoid rushing; uneven angles or pressure can damage the blade or hurt you. A clamp or vise adds extra safety.
What’s the best tool for sharpening without removal?
A magnetic angle guide or file holder is ideal for maintaining consistent angles. For faster results, a bench grinder with a rest works well, but practice on scrap metal first. Avoid hand-files unless you’re experienced—they’re harder to control.
Will sharpening without removal leave my lawn looking uneven?
Not if you’re precise! Uneven cuts usually happen from uneven sharpening or wrong angles. Use a protractor or guide to match the blade’s original bevel (usually 30°). Test on a small patch first—if the grass tears, recheck your technique.
Pro Tip:
Mark the blade’s original angle with a permanent marker before sharpening. This ensures you restore the exact factory bevel, keeping your cuts clean and your mower running smoothly. Safety first! Always work in a well-ventilated area and double-check your setup.
Wrapping up and next steps
Sharpening your lawn mower blades without removal is totally doable with the right tools and techniques—saving you time, effort, and the hassle of disassembly! 🌟 By using a file guide, angle gauge, and steady strokes, you can restore your blades to razor-sharp precision while keeping them securely mounted.
Remember, consistency and safety are key, so always wear gloves and double-check your angles.
Now that you’ve mastered this skill, take the next step: schedule regular sharpening sessions to keep your mower running smoothly all season long. A well-maintained blade means cleaner cuts, less fuel waste, and a healthier lawn—win-win! Happy mowing! 🌿✨